
I built a mobile app for checking weather – called “Pixel Weather” – with React Native. I will talk about cross-platform app development, and give a walkthrough of this project in this post.
Cross Platform vs Native Development
When it comes to cross-platform mobile app development, there are two main choices: one is Facebook’s React Native, and the other is Google’s Flutter. In the former, you use the React framework and write JavaScript code to develop your mobile app. In the latter case, you have to work with a new language, Dart. The upper side of those cross-platform framework is that you can now develop your app for different platforms with one code base, and don’t need to develop iOS and android versions of your app separately. This reduces the time and budget requirements for small teams and individuals at the beginning. However, the downside is that, it is hard to accomplish 100% native performance by using those frameworks. They may give you 60%~70%, but never comparable to true native. Quite often, you will encounter issues like flashings and white margins, and often there is no good way to solve those issues. If you are serious about user experience, and you want to generate real profit from mobile app development, the best choice today is still to go for the natives: swift for iOS, and Kotlin for android.
But if you just want to play around with mobile app development, or if you want to quickly prototype your product, then those cross-platform frameworks provide a fast way to get you started.
Why I choose React Native
In my opinion, React Native has some advantages over Flutter.
First, you don’t need to learn a new language. Front end developers know how to write JavaScript, so they automatically know how to build a mobile app with React Native. You can develop your app without leaving JavaScript. This avoids some kind of framework lock-in as in Flutter, where knowledge about Dart would not be very useful elsewhere.
Second, React Native is more popular and has a far larger community than Flutter. When it comes to libraries, there are more choices. By contrast, Flutter’s userbase is far smaller, and that means it may be harder to find solutions for solving your issues.
Third, the two frameworks take different approaches. In React Native you write your components as functions, while Flutter has a class-based approach. Personally I like to writing everything as functions, as opposed to classes, so React Native is easier to take up with for me.
Lastly, one small point is that React Native Doc has dark mode support, while Flutter’s Doc doesn’t. Even though this is only a small detail, it can still reflect the fact that React Native is more mature and has a larger and more diverse community, so that it is a safer bet.
But keep in mind that React Native is far from perfect. As of the time of writing this post, React Native is in 0.7x, and there are still lots of bugs and issues. You may often run into problems like flashing and flickering screen transitions, and sometimes it is really difficult to debug those problems. Also, currently, animation is very difficult to implement (e.g. drag and sort) in React Native, which is a very important aspect of a good user experience.
The App
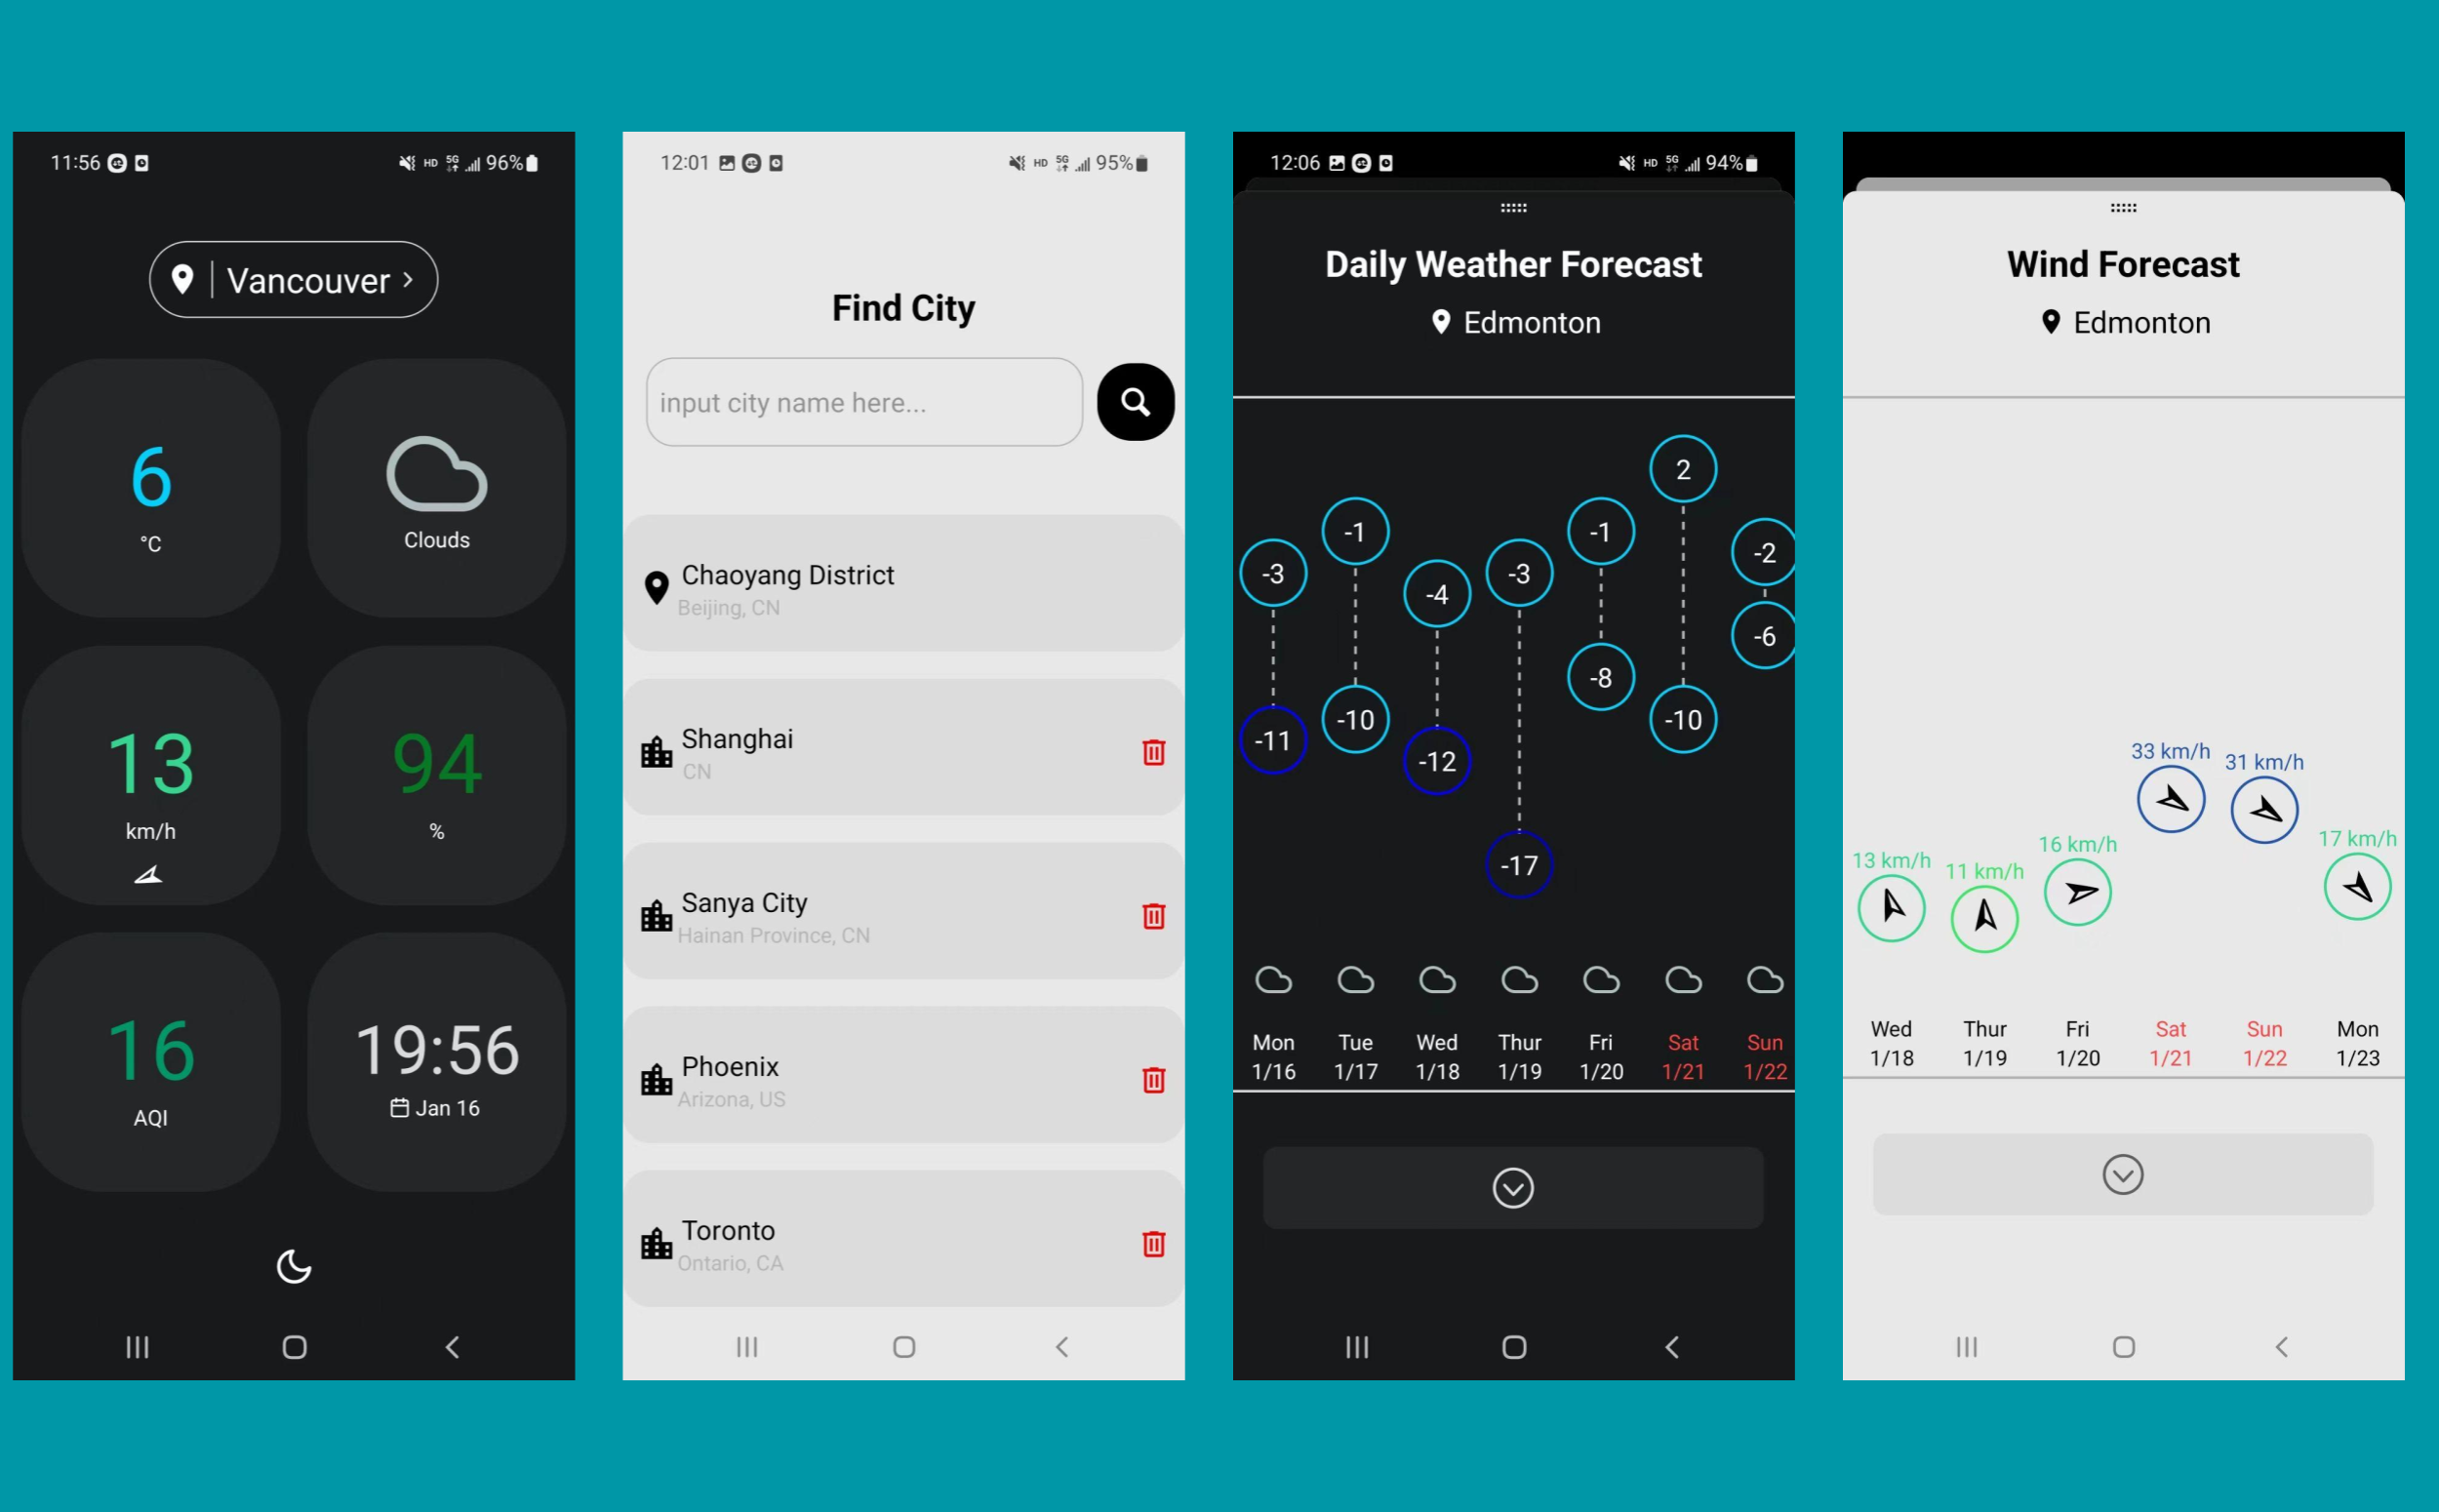
On start, the app asks for user’s permission to get the phone’s current location. If granted, the app will then fetch weather and air quality data for that location from two API sources. While fetching the data, a loading animation will be displayed.
The main page displays 6 essential weather stats: temperature, weather condition (sunny, cloudy, rainy, etc.), wind (speed and direction), humidity, air quality index, as well as the local time. Users can tap on each stat to get forecast details. Pressing the temperature will navigate the user to hourly forecast page, pressing the condition will navigate to daily forecast, and so on.
There is a button at the bottom for toggling dark and light themes.
Users can also check weathers for different cities around the world. Searching, adding and deleting cities are all implemented as in other weather applications.
Download the App
Android
Scan the QR code below to download and install the android distribution (.apk) on your phone. It is tested only on Samsung A52G.

Features
Distinct from many other weather apps that you can find in your app store, this weather app provides alternative features for anyone who wants something different.
Big component sizes. This makes it more accessible, and convenient for outdoor usage. Personally I prefer this kind of simple and old-fashioned design over those heavy and delicate ones.
Dark theme support. Friendly for usage at night.
Varying colors. The color of the numbers will change according to the value. For example, blue colors for colder temperatures, orange and red colors for hotter temperatures. This provides a good visualization for the stats. You could also get an impression of a place’s weather by its colors.
Display local time. You can use this app as a world clock.
Provide air quality info. Air quality is a very important factor for human health. It is also an indicator of environmental pollution. Many places on earth, including India, China, parts of Europe, still experience heavy air pollutions very often.
Dependencies
This project uses the following packages and libraries:
React Navigation, for navigating different screens.expo-location, for getting user’s current location.axios, for making API requests.AsyncStorage, for saving locations locally on user’s phone.lottie-react-native, for loading animation during data fetching.react-native-flash-message, for displaying messages.Sentry, for error logging in production.
API Providers
This weather app uses data from the following two sources:
- OpenWeather, for weather data;
- World Air Quality Index Project, for air quality data.
How to Build
git clonethe repository to your local machine.1
git clone https://github.com/lifeitech/pixel-weather.git
cdto the folder. Run1
npm installto install all dependencies.
Apply for API keys from the two data source providers mentioned above. You may need to provide your credit card information for weather data subscription. Create
.envin the root folder, and put your API keys into this file, like1 2
WEATHER_KEY=your-key-string AIR_KEY=your-key-string
Run
1
 npm start
or
1
 expo start
You will then see a QR code in the terminal. Open the Expo Go app on your phone, scan the QR code to run this project on your phone.
More Screenshots
| Hourly Forecast | Wind Forecast | Humidity Forecast |
|---|---|---|
 |  |  |
| Add City | Delete City | AQI Info |
|---|---|---|
 |  |  |
| Light theme - home | Light theme - humidity forecast | Light theme - location panel |
|---|---|---|
 |  |  |
Comments powered by Disqus.